Showing posts with label free pattern. Show all posts

Sunday, January 19, 2014

The Horse Year


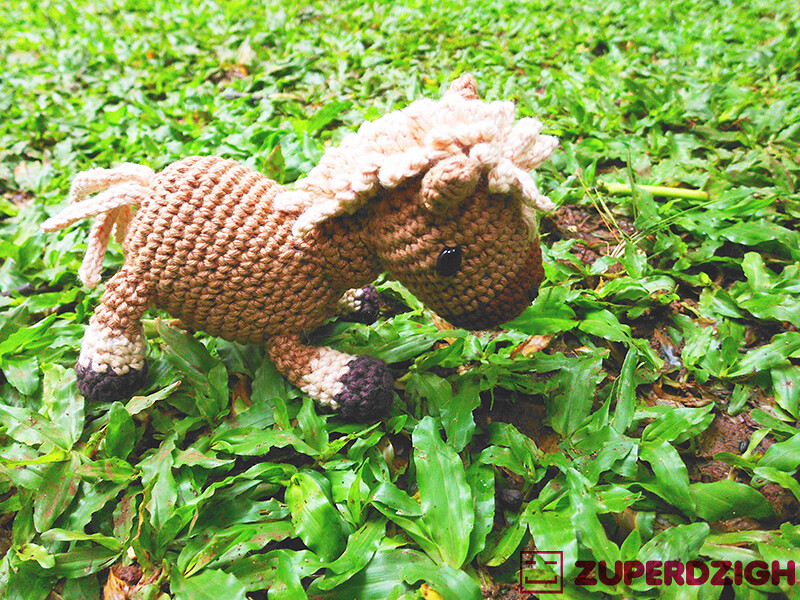
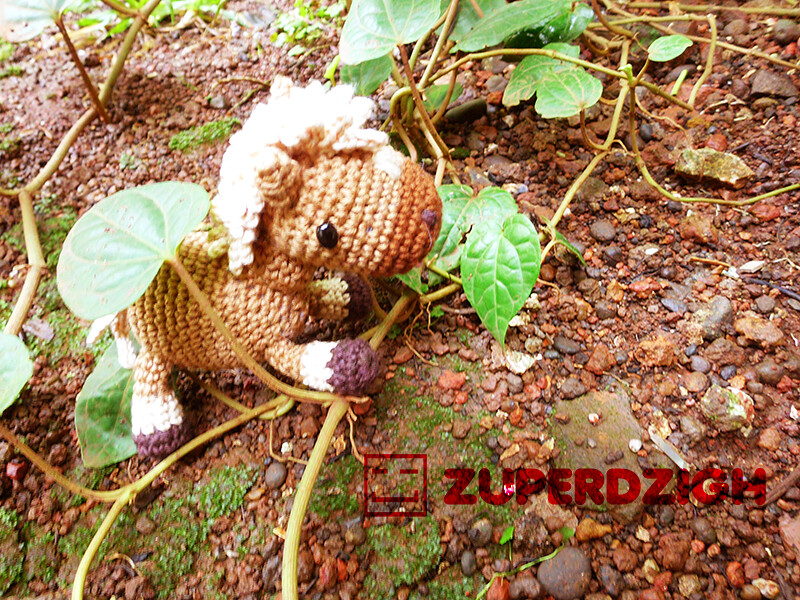
2014 is the Horse Year ( based on the Chinese Zodiac).  To celebrate the upcoming Chinese New year, let's make a horse amigurumi.
Feel free to modify the pattern to make your special horse amigurumi, but do not sell this pattern, or copy without mentioning this blog. And don't forget share your creation :)
Happy New Year, hope you all be healthy and this year would be a prosperous year for all of us :)

Here's the pattern:

Head
Start using brown yarn, make 6sc in a loop
Rnd1: (scinc) 6 times [12st]
Rnd2: (Sc, scinc) 6 times [18st]
Rnd3: (2sc, scinc) 6 times [24sts]
Rnd 4-5: sc around [24sts]
Continue the next round using Light brown yarn
Rnd 6-8 : sc around [24sts]
Rnd 9: (3sc, scinc) 6 times [30sts]
Rnd 10-12: sc around [30sts]
Rnd 11: (3sc, scdec) 6 times [24sts]
Rnd12: (2sc, scdec) 6 times [18sts]
Stuff it with some polyfills
Rnd13: (Sc, scdec) 6 times [12sts]
Rnd14: (scdec) 6 times [6sts]
Finish off

Neck
Using light brown yarns make 18 ch
Slip stitch to the first ch to make a loop.
Rnd 1: 18sc [18sts]
Rnd 2: sc around [18sts]
Rnd 3: (4sc, scinc) 3 times [15sts]
Rnd 4: sc around [15sts]
Finish off, leave a long tail to sew the neck to the body and the head.

Body

Start using Light brown yarn, make 6sc in a loop
Rnd1: (scinc) 6 times [12st]
Rnd2: (Sc, scinc) 6 times [18st]
Rnd3: (2sc, scinc) 6 times [24sts]
Rnd 4: (3sc, scinc) 6 times [30sts]
Rnd5-12: sc around (30sts)
Rnd 13: (3sc, scdec) 6 times [24sts]
Rnd 14: sc around [24sts]
Rnd15: (2sc, scdec) 6 times [18sts]
Stuff it with some polyfills
Rnd16: (Sc, scdec) 6 times [12sts]
Rnd17: (scdec) 6 times [6sts]
Finish off.

Foot ( make 4)
Start using Dark brown yarn, make 12sc in a loop
Rnd1: sc around [12st]
Rnd2: (sc, scdec) 4 times [8sts]
Continue next round using creme yarn
Rnd 3-5: sc around [8sts]
Stuff it up, then Continue next round using brown yarn
Rnd 6: (2sc, scdec) 2 times [6sts]
Rnd 7-9: sc around [6sts]
Finish off, leave a long tail to sew the leg to the body.

Since I have trouble in translating the crochet term using English, I make a picture of the instruction for the tail and hair part (I believe there's an english term for horse hair, but I don't remember it).

click to zoom for a better view

sew all the parts to its place, add some eyes, and some details using embroidery.  in my version, I add a creme spot at the face.


Friday, December 14, 2012

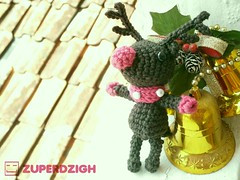
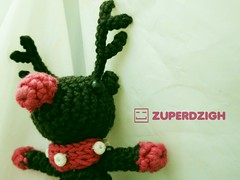
The Pink Nosed Reindeer (with pattern)

I'm a slow starter, at the late November the Mall already begin decorating their shop in Red and Green, while me just getting the holiday spirit 10 days before Christmas.
Instead of making traditional Red and Green Christmas ornament, I made a little twist.  it's a coincidence actually, I got free yarns from Mbak Oty (@Rajutanmama), the colors are pink and black.  I love Pink, I hate Black, but I love the combination.  So I made a black Reindeer with a shinny shocking pink nose :)
I think it's okay to add some dark color to the season of joy, isn't the light looks brightest in the dark?


since it's Holiday, I'm sharing the pattern too:

Head 
With black yarns working in rounds (slst to the first st of every rnd and add 1ch before every rnd)
Rnd1:  started with 6 sc in a magic loop
Rnd2: scinc 6 times (12sts)
Rnd3: [sc, scinc] 6 times (18sts)
Rnd4: sc around (18sts)
Rnd5: [2sc, scinc] 6 times (24sts)
Rnd6-10: sc around 6 times (24sts)
Rnd 11:  [2sc, scdec] 6 times (18sts)
if you are using safety eyes for the eyes, it's time to attach them.
add some fillings.
Rnd 12: [sc, scdec] 6 times (12sts)
Rnd 13: [scdec] 6 times (6sts)
finish off

Ears (make 2)
3 ch
work from the second ch to the hook, sc, 2 hdc,
turn over (work on the lower side of the chains), hdc, sc.  finish off.
leave a long tail of yarn to sew the ears to the head.

Antlers (make 2)
13 ch
work from the second ch to the hook, 4 slst,
add 3ch, then slst until you meet the base ch.
3slst,
add 4ch, then slst until you meet the base ch.
3slst, finish off
leave a long tail of yarn to sew the antlers to the head (in front of the ears)


Nose
With pink yarns working in rounds (slst to the first st of every rnd and add 1ch before every rnd)
Rnd1:  started with 6 sc in a magic loop
Rnd2: [2sc, scinc] 2 times (8sts)
Rnd3: [2sc, scdec] 2 times (6sts)
add some fillings
Rnd4: [sc, scdec] 2 times (4sts)
finish off, leave a long tail of yarns to sew the nose to the head

Body
With black yarns working in rounds (slst to the first st of every rnd and add 1ch before every rnd)
Rnd1:  started with 6 sc in a magic loop
Rnd2: scinc 6 times (12sts)
Rnd3: [sc, scinc] 6 times (18sts)
Rnd4: [2sc, scinc] 6 times (24sts)
Rnd5: sc around (24sts)
Rnd6: [2sc,scdec] 6 times (18sts)
Rnd7: sc around (18sts)
Rnd8: [sc,scdec] 6 times (12sts)
Rnd9: sc around (12sts)
add some fillings
Rnd10: [sc,scdec] 4 times (8sts)
Rnd11: sc around (8sts)
finish off, leave a long tail of yarn to sew the body to the head.  (yes, you may sew them now).

Tail
With black yarns working in rounds (slst to the first st of every rnd and add 1ch before every rnd)
Rnd1:  started with 6 sc in a magic loop
Rnd2: [2sc, scinc] 2 times (8sts)
Rnd3: scaround (8sts)
add some fillings
Rnd4: [scdec] 4 times (4sts)
finish off, leave a long tail of yarn to sew the tail to the body

Hands (make 2)
With pink yarns working in rounds (slst to the first st of every rnd and add 1ch before every rnd)
Rnd1:  started with 8 sc in a magic loop
Rnd2: [sc, scdec] 2 times (6sts)
change into black yarns,
Rnd3: [sc, scdec] 2 times (4sts)
Rnd4-8: sc around (4sts)
finish off, leave a long tail of yarn to sew the hands to the body

Hands (make 2)
With black yarns working in rounds (slst to the first st of every rnd and add 1ch before every rnd)
Rnd1:  started with 8 sc in a magic loop
Rnd2: [sc, scdec] 2 times (6sts)
Rnd3: [sc, scdec] 2 times (4sts)
Rnd4-8: sc around (4sts)
finish off, leave a long tail of yarn to sew the hands to the body

Neck warmer (optional)
with pink yarns and a set of DPN
make an icord, measure it so the length could cover the neck,
once it's done, finish off, place it on the reindeer's neck sew the ends together.
add some beadings for accents.
you could also make shawl  or crocheted shawl  instead of neckwarmer.

done! you have a reindeer :)
(maybe I'll make santa claus too...MAYBE)

Tuesday, July 10, 2012

that Mustache

tomorrow will be an election day to pick the new Jakarta's Governor.
the old governor (who is also the candidate for this year's election), is famous for his mustache.
nothing special about the mustache, except he use that mustache in his every campaign.

I'm not an official Jakarta citizen, so I don't have to vote, it doesn't matter who will win,
Let's just hope for the best, like what the crossword book tagline: "Biarkan apa yang terjadi, Broo!" ("just let whatever will be, Bro!")
since this could be the last moment of fame of that mustache, or maybe the new beginning of another Mustache government,
how bout, crochet some mustache? maybe to celebrate the day off (due to the election day, yihaa)

"Biarkan apa yang terjadi, Broo!"


here's the pattern... you'll need to zoom it :)

mobile phone user, who can't zoom, no complaining, Bro... you get it for free...

Thursday, December 29, 2011

Bandersnatch head guide

when I made Bandersnatch amigurumi last year, I didn't know that there are a lot of people beside me who like Bandersnatch too, and ask about my amigurumi version.
And I feel really bad that I couldn't help them, I made it too many time ago, that I don't remember the pattern,
so I can't share the pattern.
I also unable to sell it cause I only made one, and I don't have more stock of yarns to make a new one.

there's also a request for a Bandersnatch photo (and I was happy to re-took the photos)

Today I read another comment from Tonya saying now that she's learn to crochet to make her own Bandersnatch amigurumi.
So Bandersnatch fans, say thanks to Tonya cause I'm writing this guide for her, but then I guess it's not hurt to share it here, just in case anybody need it aswell.
it's not a pattern, just a guide to the head part, and sorry if it's hard to read, I have to type it quickly or I will get another back pain for typing on the floor.


right click to save the picture then ZOOM it :)


Wednesday, November 16, 2011

Free pattern: Teru Teru Bozu

in Indonesia, when you are going to held an outdoor event, it's common to specially hire a person to prevent the rain.
it can not be just any guy, you need a person who has power to control the rain, a pawang hujan.
even if it's raining everywhere, the place with a pawang hujan is completely dry.
Some says that as long as the pawang hujan not having contact with water, it won't be raining at all. 
whether it's true or not, I really don't know about it.

while hiring Pawang Hujan requires money, Japanese kid have Teru Teru Bozu to prevent the rain, which is a lot cheaper.
Both ways don't have any guarantee in keeping the rain away, but it would be fun to make a cute Teru Teru Bozu than just sitting and hoping it wouldn't be raining.
so, just in case you want to make Teru Teru Bozu in amigurumi style, here's my pattern.
feel free to use it, and if you are going to share it please link it back to this post :)
and I would love to see the result, if you tried this pattern :)

you might need to zoom this picture for better view

Wednesday, August 3, 2011

Nastar time!

I'm not fasting, but I've been waiting for this month to come.
because fasting month is cookies month!
like Christmas, on Lebaran we usually visit or being visited by family or friends.
so before Lebaran came, we usually prepared some snack to serve the guest.
the popular snack for Lebaran is cookies.
not just any cookies, it's Nastar or kastengel.
Nastar and Kastengel are cheese based cookies.
Nastar is more complicated than Kastengel because it has some pinneapple jam inside.


the real one is made by Dora, my sister in law, very delicious!

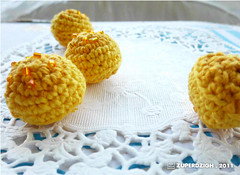
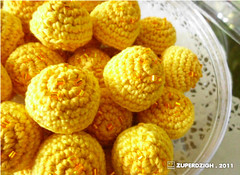
for the tradition-sake, I make some Nastar too, crocheted Nastar of course.
you could also try to make some too :)

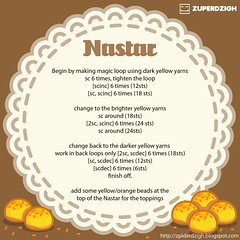
zoom to read the pattern, or you could also print the simplified pattern


The real Nastar's top usually coated by yolk to make it shiny and then has some cheese sprinkle at it.
I used two tones of yellow yarns to recreate the baked effect and sew some beads for the sprinkles.


FYI, I used 7 beads in every Nastar and there are 36 Nastar in the jar  (not important fact, but I MUST write it).

while for the real recipe.... umm, I'm not proud of it, but I can't cook at all, so I have to ask my sister in law or my mother for the recipe.

Just in case you try the pattern, please do share the pictures :)
oh, and you may sell the Nastar, but do not sell the pattern.
if you are sharing the pattern, please link back to this post, not to the pattern directly.

Tuesday, May 17, 2011

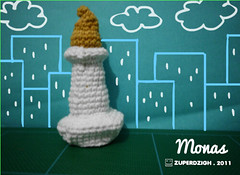
Monas 1.2

Have you been to Jakarta?
You've never been to Jakarta if you haven't see its traffic Monas :)

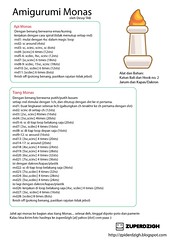
made this pattern for the Indonesian knitter community (Milis Mari Merajut)


Monas is an obelisk type monument built in Jakarta, the capital of Indonesia.
it's actually my second attempt on making the monument, because the first one is way too tall, about 4 times taller than a skyscraper building (amigurumi building, of course)
there might be Monas 2.0 or more since it still need some perfection.
but if you think a Chibi-Monas-Amigurumi is cute enough, here's the pattern.

right-click to view it larger

The Pattern is in Bahasa, but if you need the English pattern, just write a comment, cause I'm not sure everybody want to make Monas.
Me? I'm more a Gedung Sate person.

Btw about the torch's color, it was a big debate between me and others.  It was supposed to be Gold, but I saw it more like Kuning Tai yellowish -brown, while others insist it has to be more brighter yellow.
what do you think?


took the picture from here

Saturday, April 9, 2011

Kue Gem

Recently, people are crazy about old, classic and vintage stuff.
from music, mode, design to food.
anything "jadul" (old fashioned) could easily became hit.
one of the jadul food is Kue Gem.


I'm not sure what its name, I just find that name written at its label.
Kue Gem has sugar icing on its top, and that is the most memorable taste of this snack.
I'm really glad to find they still produce Kue Gem nowadays in Bandung.
I'm not into sweets, but surprisingly I still like Kue Gem.
I think it is perfect for tea time or maybe for girls' party if you don't have cupcake, it's sweet and cute, children definitely would like it.
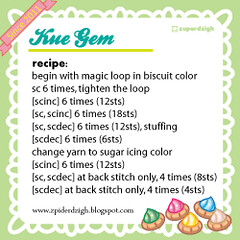
I don't know if you could find Kue Gem in your place and I don't have the recipe for the real biscuit but I have a Kue Gem amigurumi recipe for you :)


feel free to make as much Kue Gem as you can, put it in a jar or share it with your loved one.
You may sell the kue gem amigurumi, but please don't sell the pattern, and please link back to this post not to the picture directly.

Sunday, January 30, 2011

the Chinese Gold Ornament

lately I love to go to shops/ malls seeing the Chinese New Year Decorations.
Not because I'm celebrating it, but it's Gold everywhere (I knew it's fake)
Since I'm more like Uncle Scrooge than a Daisy Duck, I really love seeing money and other valuable stone :)
I'm not Chinese but I thought it would be interesting to have some Chinese gold ornament for the Chinese New Year.


You might try too, I wrote the pattern but actually never tested it yet, so please understand if there were some mistakes.
And don't forget to hope for better prosperity :)

Oh It's shinning! it must be gold :p

 the pattern (right click then "save as")

Sunday, December 19, 2010

Birthday Giveaway!

it's my birthday today!

Oh I wanna be like Oprah, sharing a lot of gift to the audiences,
but you know, I'm not a rich person.

If I could, I would give you an android phone, but for now,
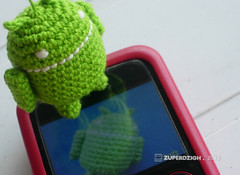
I share you a free Android dolls pattern, so every of you could have an android (doll) :)


the android doll

click to enlarge, right click to save the image

Don't know how to crochet or knit?
don't worry, right now I'm preparing ONE FREE ANDROID DOLL for one lucky winner.
Indonesian or International participant may enter this giveaway, as long as you have a real address in Earth

here's the android doll I made specially for the giveaway, it's hand knitted

How?
follow my blog, if you have twitter, please share link to this post with... bla bla bla.....
No, Just kidding, you don't have to follow me/ my blog.
just leave a comment under this post, write a Happy Birthday message for me, or Merry Christmas or Happy New Year, or share some idea for my next dolls, or just write about your favorite doll from zpiderdzigh before December 31st.
I will announce the winner at January 2nd 2011.
leave an e-mail address so I could contact you if you win :)

I will choose the lucky winner based on your comment, I definitely will read it one by one.

PS: I love android, and wish to have an android phone someday, I knew it's not my right to sell the android doll, I spent more than I could get to make this android doll, just for fun, please don't sue me :p

Friday, November 26, 2010

Pig-Cat-CHU!

lately, I'm thinking of what will I be in the next 10 or 20 years.
one thing for sure, I will never become a cat lady.
But I might become a knitted-cat lady,


or to be exact a knitted-pig-cat lady


 I share the pattern (click read more), so I wouldn't be the only knitted-pig-cat lady :P
oh by the way, Happy Thanksgiving :)

Saturday, October 23, 2010

Knitting a bear (pattern or guide or just some clues)

As promised, here's a pattern or something for the knitted bear
thanks, anonymous, for reminding me about this :)

 
warning: English is not my native language, and I'm a newbie on knitting. there would be some missing guidances on this pattern because I have some trouble in descripting the process (even my real Language won't help much).
Any kind of help or suggestion on completing the missing part would be greatly appreciated.

tools:
a set of 4 double pointed needles (size 2mm)
or a circular pointed needle (same size)
1 extra double pointed needle (just in case you'll need it)
brown and gray fingering yarn (or your favorite choice of colors)
black beads for the eyes
black sewing yarn (and sewing needle).

the pattern

Foot (make 2):

begin with 6sts in a round
rnd1:[Kfb]6 times (12sts)
rnd2:[Kfb,K1] 6 times (18sts)
rnd3-11: knit around (18sts every row)
add some stuffing

Join the foots together (really I don't know how to explain this part, please help me)

How?
divide stiches in every foot into 2 needles. You got 2 foot and 4 needles so you have 9 sts in every needles. (this is when you need an extra needle to knit)


continue as if the foots are one big round part.

rnd12: knit around (18 sts every foot, so you'll get 36 sts after joining both foots)
rnd13:[Kfb,K5] 6 times (42sts)
rnd14:[Kfb,K6] 6 times (48sts)
rnd15:[Kfb,K7] 6 times (54sts)
rnd16:[Kfb,K8] 6 times (60sts)
rnd17:[Kfb,K9] 6 times (66sts)
rnd18:[Kfb,K10] 6 times (72sts)
rnd19-25 :knit around (72sts)
rnd 26:[k2tog,k10] 6 times (66sts)
rnd 27-29: knit around (66sts)
rnd 30:[k2tog,k9] 6 times (60sts)
rnd 31-33: knit around (60sts)
rnd 34:[k2tog,k8] 6 times (54sts)
rnd 35-37: knit around (54sts)
rnd 38:[k2tog,k7] 6 times (48sts)
rnd 39-41: knit around (48sts)
rnd 42:[k2tog,k6] 6 times (42sts)
rnd 42-44: knit around (42sts)
add some stuffing for the big stomach
rnd 45:[k2tog,k5] 6 times (36sts)
rnd 45-51: knit around (36sts)
rnd 52:[k2tog,k4] 6 times (30sts)
rnd 53:[k2tog,k3] 6 times (24sts)
rnd 54:[k2tog,k2] 6 times (18sts)
rnd 55:[k2tog,k] 6 times (12sts)
add some stuffing for the head part
rnd 56:[k2tog] 6 times (6sts)
finish off

Nose:

rnd 1:begin with 18 sts in a round
rnd 2-5: knit around [18sts]
rnd 6:[k2tog,k] 6 times (12sts)
rnd 7:[k2tog] 6 times (6sts)
finish off and add some stuffing before sewing the nose to the head

Ears (make 2):

rnd 1: begin with 9 sts in a round
rnd 2:[Kfb,K2] 3 times (12sts)
rnd 3: knit around (12sts)
rnd 4:[k2tog] 6 times (6sts)
finish off, no need to add some stuffing inside

Hands (make 2)
:

rnd 1: begin with 12 sts in a round
rnd 2-7:knit around (12sts)
rnd 8:[k2tog] 6 times (6sts)
finish off, add some stuffing before sewing the hands to the body.

Finishing:

sew parts together.
add some embroidery on the nose part as you like
add some beads for the eyes, but if it was for younger children, please consider using safety eyes or embroidered eyes.

You may add a tail on the back, using the ears pattern.
(do real bears have tails?)
 
Last thing, don't forget to share the picture of your knitted bear :) 
 
* I made this pattern at the early morning, when I haven't wash my face.. so there might be so mistake :p

Saturday, April 24, 2010

New Recipe : Baby Octopus

the real Baby Octopus at the Sushi restaurant
right click on the picture to read the recipe or save it for your sushi night

Me and my sisters love sushi a lot!
our favorite is unagi roll and baby octopus
yeah, that's cruel, eating babies.
But it is so delicious!
So here's the recipe, of course the amigurumi recipe, cause I can't cook.
I didn't put any eyes on the amigurumi,
because I prefer not to look at the eyes of the creatures I'm eating.

Do not hesitate to ask if you find any problem with the recipe.
and I would like to see too if you tried making your baby octopus :D

Warning: the baby octopus-gurumis are not edible :D

EDIT: sorry, there's a mistake in rnd3, it should be repeated 6 times, instead of 3 times
I've updated the picture.

Monday, October 26, 2009

Twittering Bird Pattern

:::My very first pattern! YAY!:::

find the pattern here

feel free to ask if you had a problem with the pattern
and I would love to see your twittering amigurumi bird too
FYI, there is only pattern for the bird, someday I'll post the tweet bubble too
*Do not sell this pattern, or you will get diarrhea for 1 year straight*

EDIT: there's a mistake on the pattern,
for row 11-15 it should be : 1 scinc, 12 sc, 1 scdec, 1 sc dec, 12 sc, 1 scinc
I'm so sorry :( I'm still have to learn to write pattern